


A quick look at Dev Tunnels
A Blog from Mike Irving, Software Developer
By Mike Irving - Published: 19/10/2025
Over the last year or so, I have found Visual Studio Dev Tunnels to be useful for a variety of use cases, including:
- Showing off prototype Web Applications to colleagues
- Connecting Mobile Apps to pre-release APIs
- Allowing colleagues to connect, demonstrate a bug, and have me debug their session
However, most people I speak to, seasoned .NET Devs, seem to have never heard of them!
So What are Dev Tunnels?
The "dev tunnels" feature of Visual Studio allows non-directly connected computers to connect to one another, by providing an ad-hoc (temporary or permanent) URL to an ASP.NET Web Application running on localhost.
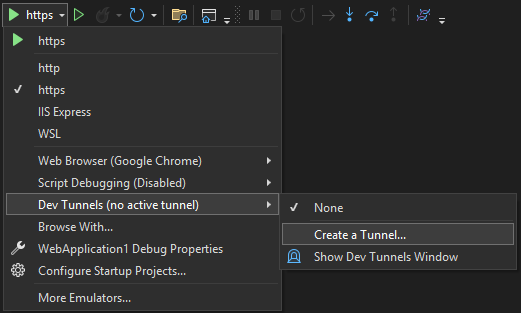
Create a Tunnel
To start your journey, select Dev Tunnels > Create A Tunnel from the Debug dropdown menu in Visual Studio.
You will then see a dialog popup.
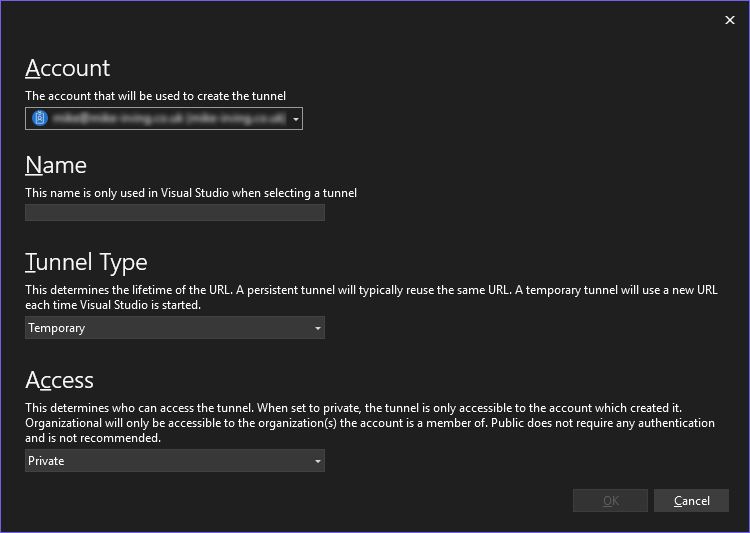
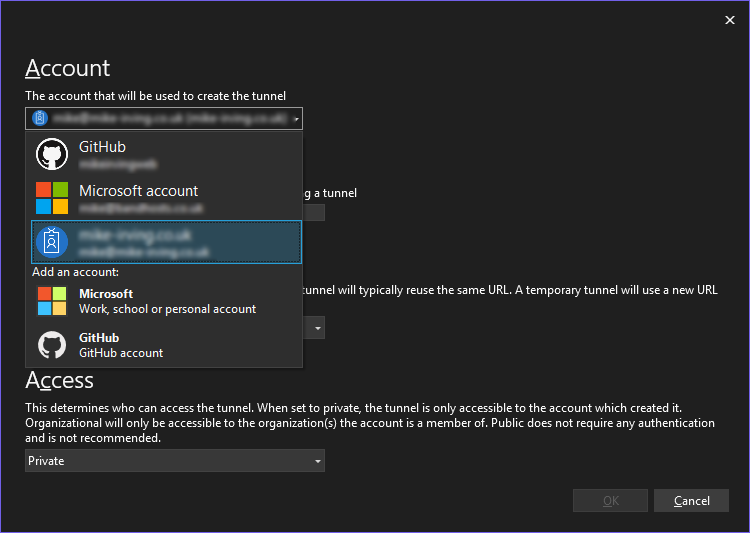
You need to specify an Account that will be used for creation of the tunnel.
This can be your Visual Studio Account, your GitHub Account, or indeed any Microsoft Work, School or Personal Account.
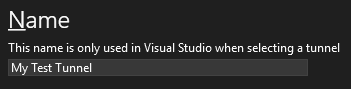
Next, Give your Dev Tunnel a Name, for example My Test Tunnel.
Then choose a Tunnel Type - Temporary or Persistent.
Persistent Tunnel URLs are saved in Visual Studio, and can be reused in subsequent visits to your project.

We must then specify an Access Type.
Choose from Private (use only by your account), Organizational (for use within your domain / organization) or Public access, available to all.

For the purposes of the remainder of this blog, we will be talking about Public Dev Tunnels.
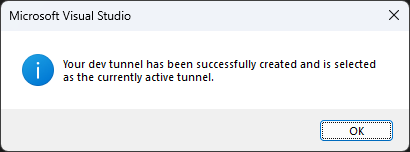
Click OK, and you will hopefully be presented with a Success message!
Test your Dev Tunnel
Go ahead, Press F5 / Start Your App for Debugging.
If it is a Web Application, then upon the first request of the Tunnel URL by your Browser, you will see an interim page, Microsoft branded, and reading "You are about to connect to a developer tunnel at: ..."
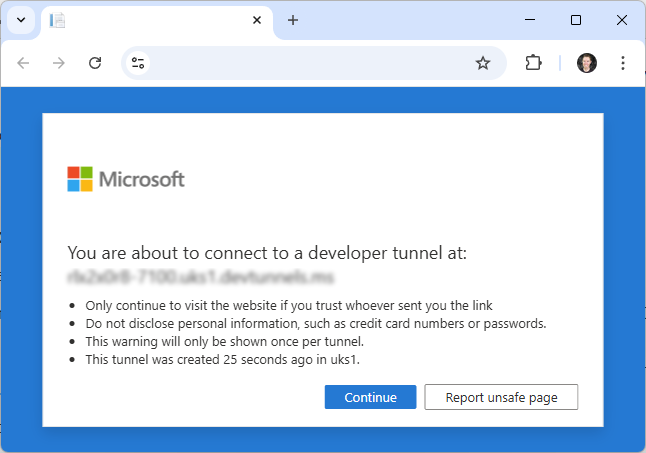
Hit Continue to confirm you want to proceed.
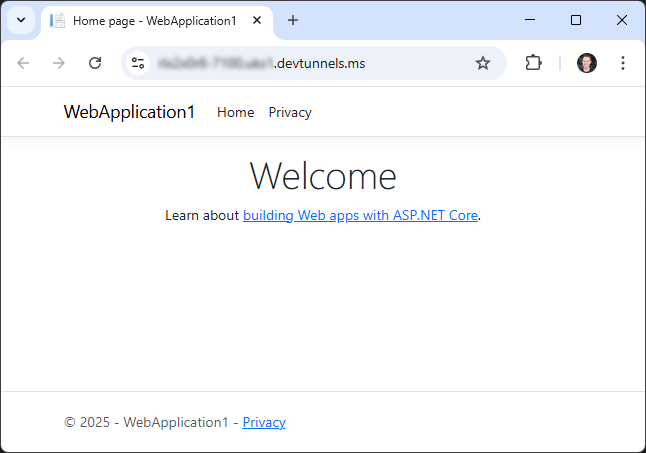
Give the URL to anyone else, ask them to navigate to it in a web browser, and they will get the same message the first time they connect.
Once successfully connected, and past the splash screen, all requests are tunnelled back to your localhost machine:
Breakpoints
Add a breakpoint in your app, and users will hit it, allowing you to see and debug their data.

Web API?
If it is an API you are debugging, users will connect direct - with no equivalent of the splash screen to navigate through.
You can go ahead and receive calls to your Web APIs, and debug them.
This can be great when quickly iterating an API to, for example, add new fields. Provide the test dev tunnel URL to the team member or third-party to test and confirm their use case, and iterate as necessary.
This has been just a quick run through of Dev Tunnels, but I hope that some readers have discovered something new!
Further reading: Microsoft Learn
View Blog Entries...
Page: 1, 2, 3, 4, 5, 6, 7, 8, 9, 10, 11


